1. VPC 및 Subnet 생성
VPC : 10.10.0.0/16
Subnet
web : 10.10.0.0/24, Internet Gateway는 Y (Public)

was : 10.10.1.0/24, Internet Gateway는 N (Private)

DB : 10.10.2.0/24, Internet Gateway는 N (Private)

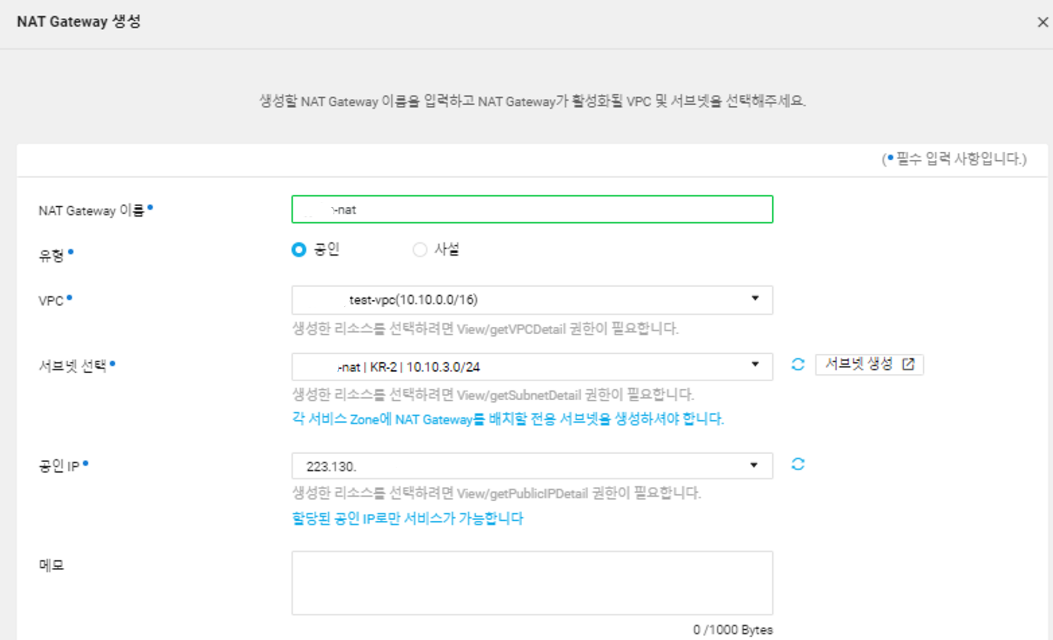
NAT gateway용 서브넷 생성 : 10.10.3.0/24, Internet Gateway는 Y (Public), 용도는 NAT Gateway

2. NAT Gateway 생성
3. Route Table 설정
Route Table 생성 후, 연관 Subnet 및 Routes 설정


4. ACG 설정
WEB IP : 10.10.0.6/32
WAS IP : 10.10.1.6/32
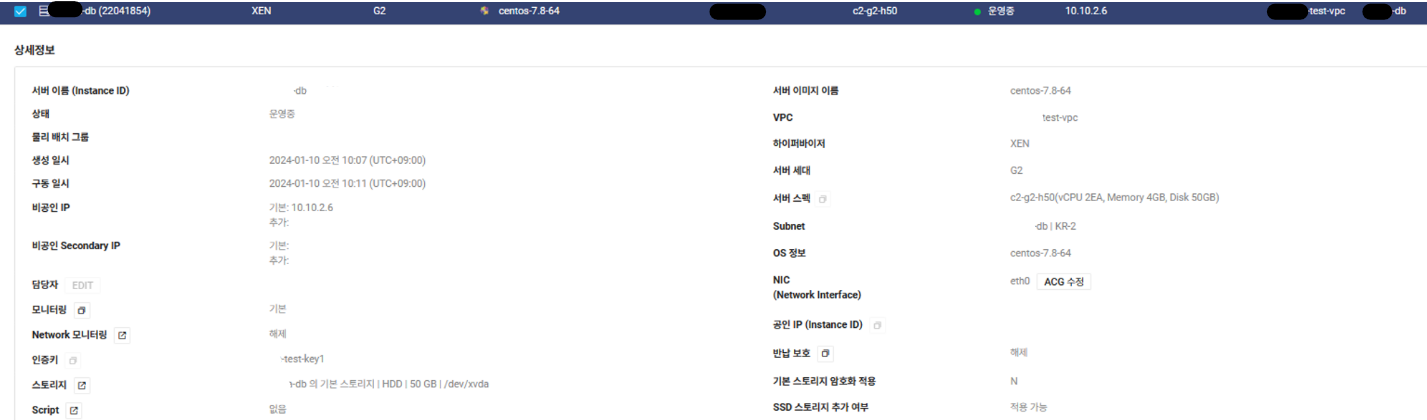
DB IP : 10.10.2.6/32
WEB ACG
- 외부에서 22포트로 SSH 접속
- 외부에서 80포트로 WEB 접속


WAS ACG
- WAS는 프라이빗 서브넷에 속해 공인IP가 없다.
그러므로 WEB Server를 통하여 WAS Server로 접속. WEB --22포트-->WEB
- WEB --8080포트--> WAS


DB ACG
- DB도 마찬가지로 WEB Server를 통해 DB Server로 접속. WEB --22포트--> DB
- WAS --3306포트--> DB


5. Server 생성
WEB : centos-7.8

WAS : centos-7.8

DB : centos-7.8
6. 접속 확인
- WEB은 공인 IP로 접속
- WAS와 DB는 WEB서버를 통하여 접속
# ssh root@<was/db 서버 ip>
<WAS/DB서버의 관리자 비밀번호>

[root@test-web ~]# ssh root@10.10.2.6
The authenticity of host '10.10.2.6 (10.10.2.6)' can't be established.
ECDSA key fingerprint is SHA256:wuBYmLzr0.
ECDSA key fingerprint is MD5:e6:68:1b:79:b8:18:ba::fa.
Are you sure you want to continue connecting (yes/no)? yes        #처음 접속하면 이런 메세지 뜸
Warning: Permanently added '10.10.2.6' (ECDSA) to the list of known hosts.
root@10.10.2.6's password:
[root@test-db ~]#
Next - WEB, WAS 설치 및 연동하기 👇
Cloud/NCP[NCP] NCP VPC 환경에서 3-tier 구축하기 - 2.WEB-WAS 연동까지 (tistory.com)
'Cloud > NCP' 카테고리의 다른 글
| [NCP] NCP VPC 환경에서 3-tier 구축하기 - 3.WAS-DB 연동까지 (2) | 2024.01.21 |
|---|---|
| [NCP] NCP VPC 환경에서 3-tier 구축하기 - 2.WEB-WAS 연동까지 (0) | 2024.01.20 |
| [SSL인증서] NCP - Certificate List에 SSL 인증서 등록 방법 (0) | 2023.08.28 |
| [LVM] 방법3. LVM 해제한 후, 확장하기 (0) | 2023.08.23 |
| [LVM] 방법2. 추가 스토리지 생성으로 확장하기 (0) | 2023.08.23 |