Cloud/NCP
[NCP] NCP VPC 환경에서 3-tier 구축하기 - 3.WAS-DB 연동까지
yeit
2024. 1. 21. 17:32
728x90
DB - MySQL 설치
1. MySQL 설치
1-1. MySQL yum Repository 설치
# yum install -y https://dev.mysql.com/get/mysql80-community-release-el7-3.noarch.rpm
1-2. 확인
# yum repolist enabled | grep mysql
1-3. yum으로 mysql 설치
# yum install -y mysql-server
mysql 설치 시 RPM-GPG-KEY-mysql~~ 에러가 발생한다면👇
[MySQL 설치 시 에러] RPM GPG KEY Error (tistory.com)
1-4. MySql 설치 확인
# mysql -V
1-5. 부팅 시 mysqld 자동 시작 설정 및 mysql 실행
# systemctl enable mysqld
# systemctl start mysqld
1-6. 확인
# systemctl status mysqld.service
# ps -ef | grep mysql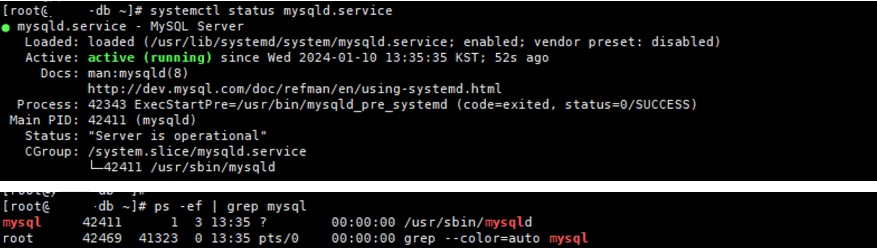
2. MySQL 설정
2-1. MySQL 임시 패스워드 확인 후 접속
패키지 설치 시 root 패스워드가 임의로 지정된다.
# grep 'temporary password' /var/log/mysqld.log
# mysql -u root -p
1t5*dp8
2-2. root 비밀번호 변경
mysql> ALTER USER 'root'@'localhost' IDENTIFIED BY '비밀번호';
2-3. 테스트용 계정 생성 및 모든 권한 부여
mysql> CREATE USER 'testuser'@'%' IDENTIFIED BY '비밀번호';

mysql> GRANT ALL PRIVILEGES ON *.* TO 'testuser'@'%';
2-4. user 테이블 확인
mysql> use mysql; select host, user from user;
2-5. 데이터 베이스 및 테이블 생성
# 1. 데이터베이스 생성
mysql> CREATE DATABASE TEST_DB;


# 2. 테이블 생성
mysql> use TEST_DB;

mysql> CREATE TABLE test_tb(
	id INT AUTO_INCREMENT PRIMARY KEY,
	name VARCHAR(100),
	age VARCHAR(100),
  email VARCHAR(100));


# 3. 데이터 삽입
mysql> INSERT INTO TEST_DB.test_tb (name, age, email)
	VALUES ("Linda", "19", "linda@never.com"), ("David", "21", "david@never.com"), ("John", "30", "john@never.com"), ("Sarah", "28", "sarah@never.com");

mysql> select * from test_tb;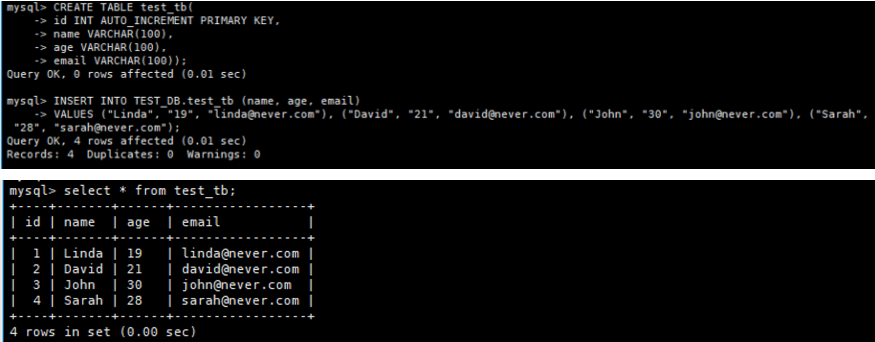
WAS - DB 연동
1. WAS server 설정
1-1. was에서 mysql 접근
# yum install mysql -y
# mysql -u testuser -h <DB서버 IP> -p
testuser 비밀번호
Authentication plugin 'caching_sha2_password' cannot be loaded ~ 에러 발생 시 👇
[MySQL 8.0 이상 에러] Authentication plugin 'caching_sha2_password' (tistory.com)
1-2. mysql connector 설치 후 압축 해제
# wget https://downloads.mysql.com/archives/get/p/3/file/mysql-connector-java-5.1.49.tar.gz
# tar zxvf mysql-connector-java-5.1.49.tar.gz
1-3. mysql-connector jar 파일을 자신의 …/tomcat/lib/으로 이동
# mv mysql-connector-java-5.1.49/mysql-connector-java-5.1.49.jar /usr/local/tomcat/apache-tomcat-9.0.4/lib/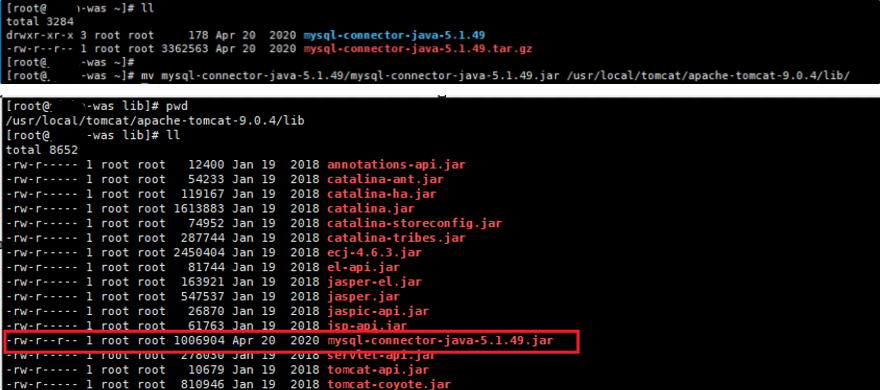
1-4. MySQL 연동 테스트 페이지 작성
자신의…/tomcat/webapps/ROOT에 test.jsp 파일 작성
# vi /usr/local/tomcat/apache-tomcat-9.0.4/webapps/ROOT/test.jsp
<%@ page language="java" contentType="text/html; charset=UTF-8"
   pageEncoding="UTF-8" import="java.sql.*"%>
<!DOCTYPE html PUBLIC "-//W3C//DTD HTML 4.01 Transitional//EN" "http://www.w3.org/TR/html4/loose.dtd">
<html>
    <head>
        <meta http-equiv="Content-Type" content="text/html; charset=UTF-8">
        <title>DB Connection Test</title>
    </head>
    <body>
           <%
              String DB_URL = "jdbc:mysql://DB 서버 IP/데이터베이스명";
              String DB_USER = "testuser";
              String DB_PASSWORD = "비밀번호";
              Connection conn;
              Statement stmt;
              PreparedStatement ps;
              ResultSet rs;

              try {
                     Class.forName("com.mysql.jdbc.Driver");
                     conn = DriverManager.getConnection(DB_URL, DB_USER, DB_PASSWORD);
                     stmt = conn.createStatement();
                     String query = "SELECT * FROM 테이블명";
                     ResultSet res = stmt.executeQuery(query);
                     out. println("<pre><h3>\t\tID\tNAME\tAGE\tEMAIL</h3></pre>");

                     while(res.next()){

                        out.print("<pre><h3>\t\t" + res.getString(1));   // test_tb.id
                        out.print("\t" + res.getString(2));   // test_tb.name
                        out.print("\t" + res.getString(3));   // test_tb.age
                        out.print("\t" + res.getString(4) +"</h3></pre>");   // test_tb.email

                        }


                conn.close();
                out.println("<br><br>");
                out.println("Test Success!");

              }
              catch (Exception e) {
                     out.println(e.getMessage());
              }
          %>
    </body>
    </html>
1-5. http://web 공인 IP/test.jsp로 접속
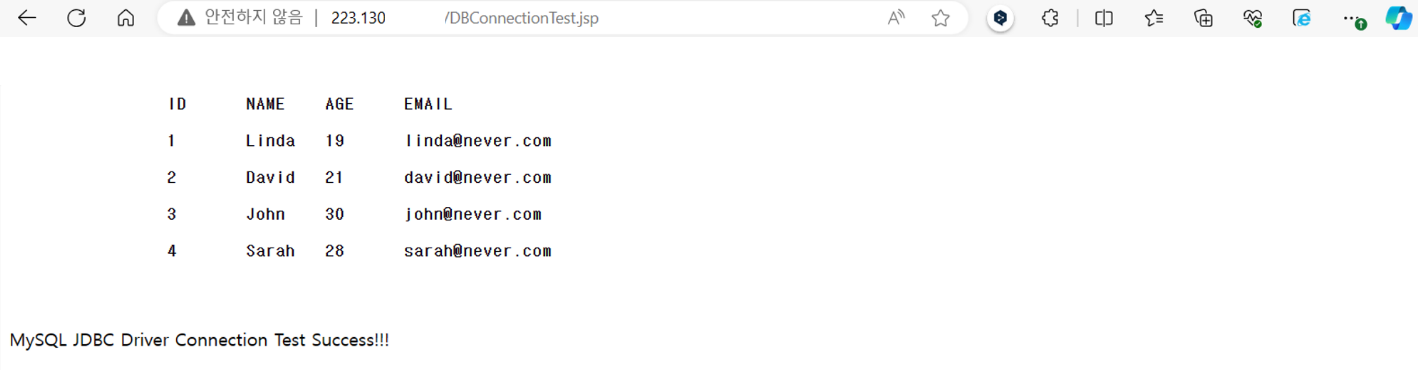
끝 !
728x90